MS Power Platform
Update! The Certified Connector is now available in Power Apps, Power Automate, Copilot Studio and Logic Apps. Click here to see details. The Connector will automatically sync your webhooks/triggers (e.g. create a flow upon a document completion) and provide ready-made Actions that provide the functionality of the REST API.
This article shows you how to set up a custom connector to the Legalesign API.
N.B. Custom connectors are useful helpers, but it is also possible to call the Legalesign API directly without it, for example: this video on how to auto-save signed PDFs to SharePoint.
To create a Custom Connector:
-
Get a Legalesign trial account at https://legalesign.com/landing/free-trial/.
-
Contact support to request an API key. Give your use-case, background in API development and information so we can verify you and your company.
-
Save to your machine the icon legalesign-icon.png and connector code legalesign-api-v1-swagger-ms.yaml.
-
Go to Power Automate > Data > Custom connectors. Click on 'New Custom Connector' and 'Import from OpenAPI'.
Complete the Power automate setup screens as follows:
General
Upload the icon you already downloaded in step 3. For 'icon background color' use the hex code #ffffff. Set host as eu-api.legalesign.com and Base URL as /api/v1/.

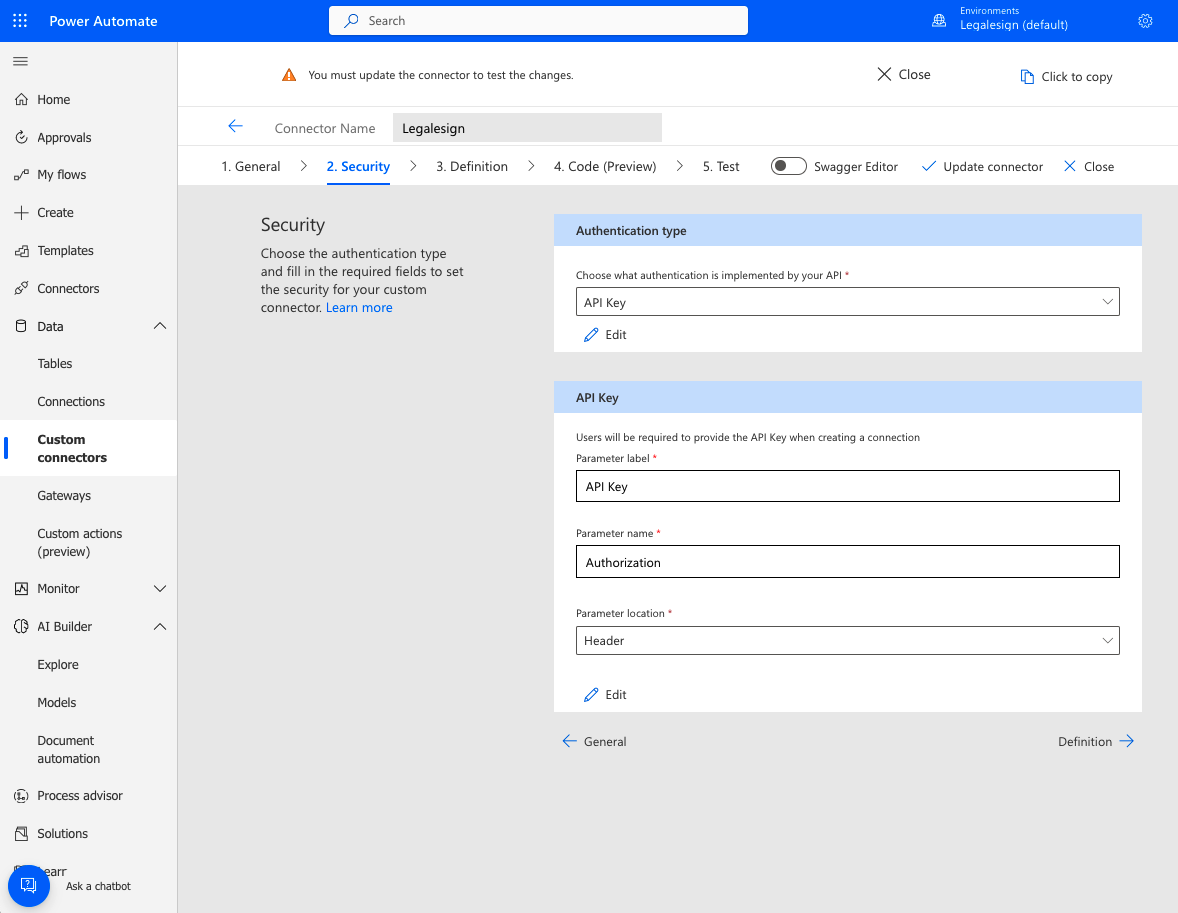
Security
Select 'API key' and the values as shown in the next image.
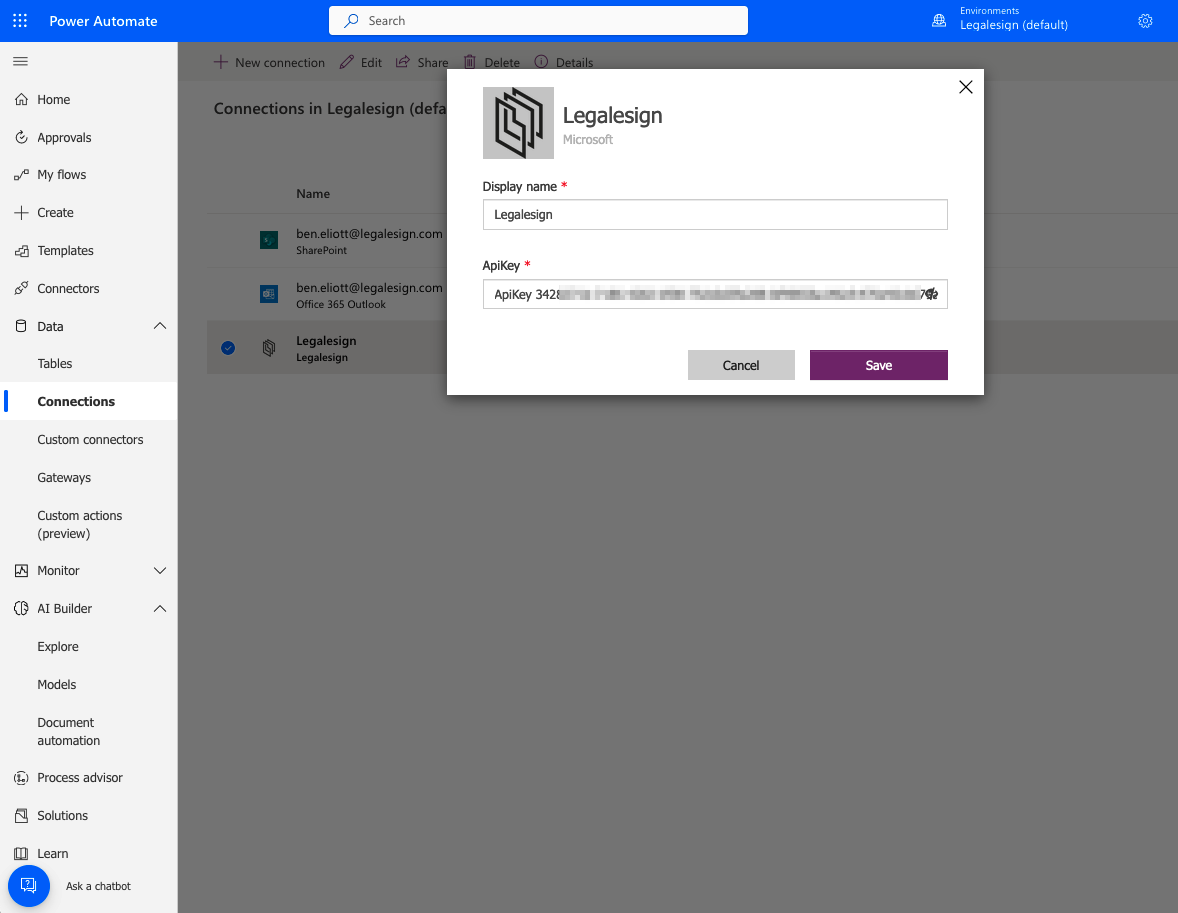
Connector
You'll be asked to set up the Connector when you enter the 'Test' section. The value you enter should start 'ApiKey xxxxx...'. Once you are verified with support, your API key can be found on the API Dashboard (https://logs.legalesign.com) on Legalesign. Paste it in exactly the same. Get Api Key on Legalesign
Test
Select a simpler query endpoint to test your connection, for example getGroups (NOT 'getGroup'). You must enter a value for offset and limit.
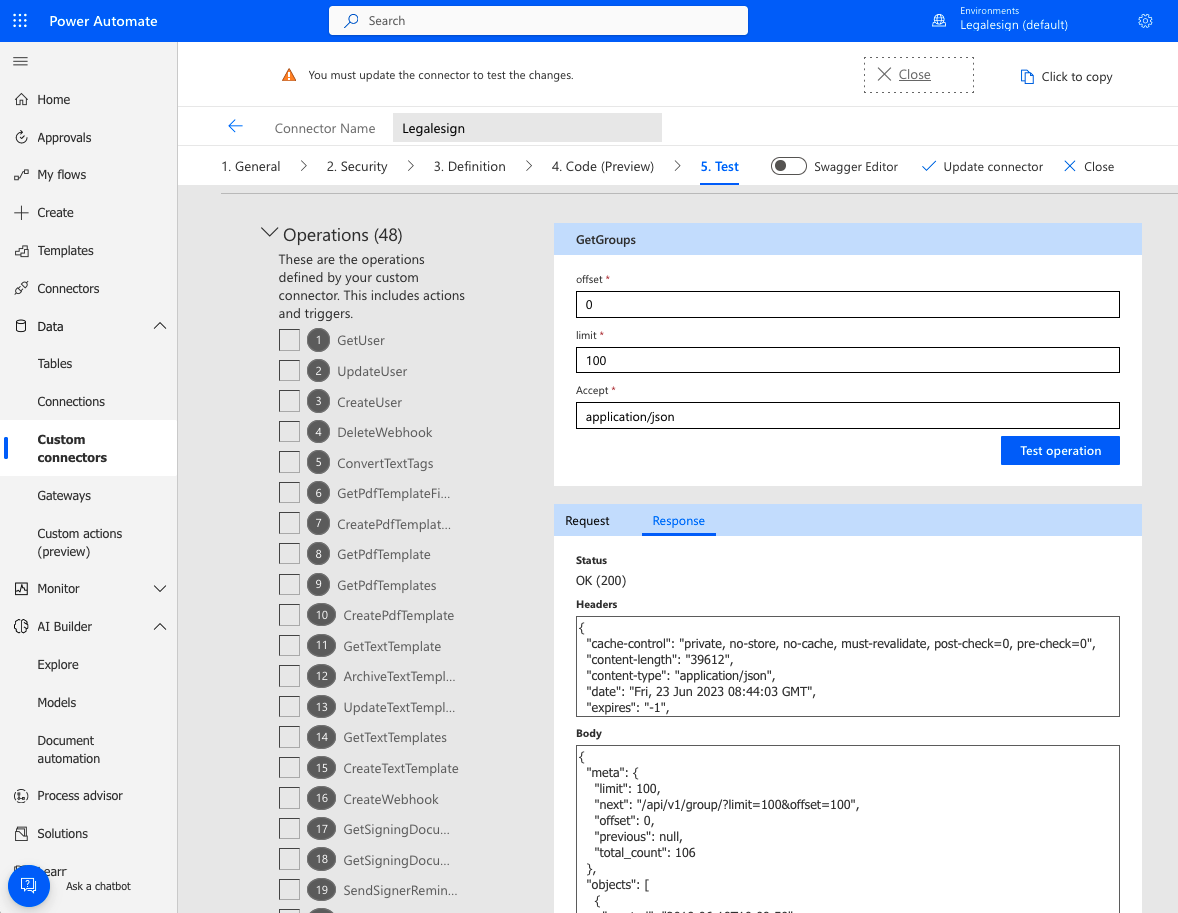
That test should return a 200 status and your groups listed. Success!
If you have any questions about Legalesign eSignature and Power Automate get in touch (create a support ticket).
Next see this video on how to use Microsoft Power Automate webhooks to trigger automation flows: how to auto-save signed pdfs to SharePoint.